

January6, 2016
First of all, thank you for playing with Eye Candy Quilts and our Kismet Quilt Along! It’s our first one, but we’re going to rock it. I can feel it. This is a little long, but there’s some housekeeping to cover before we can get to the fun stuff.
How this quilt along (QAL) will work is each week for four weeks I will give you all the tips and tricks that I use when I make a quilt. Whether you do the original pattern with a 9” block, or you go for the fierce quilt pattern with a 4.5” block, the tips should work for either quilt. And even though I know the original pattern, because I wrote it, I did not make the quilt. I did make a test block if you’re worried about the pattern and it’s accuracy. It’s safe, I promise. The lovely Brenda, also known as @bsreid44 on Instagram and the other more logical and tech savvy half of Eye Candy Quilts, made the original quilt.
The digital pattern is available via Etsy. If you’d prefer, I can send you a hard copy of the original size pattern with shipping, just send an email on the contact page and we’ll get you set up.
We’ll start on Monday February 1st and the new posts will be on the following Mondays. Each week I’ll share a different topic that will cover a different part of the block or quilt construction. Since Kismet is the same block repeated, you can get started right away and keep up by doing a certain number of blocks a week. On the other hand, you can follow along and read all the posts and then make your blocks after all the extra tips are posted. But I’ll give you a little incentive to get those blocks going a little faster—I’ll have a little giveaway for the people who post their progress to Instagram. More on that later…
In saying all of that, THERE ARE NO QUILT POLICE. One of my favorite Mark Lipinski quotes is, “No one is going to come and beat you with a yardstick until you yell Paducah.” You don’t have to keep up. You don’t have to use the tips that work for me. You don’t have to use the tools that I use. Do Kismet however it makes you happy, and I hope I can make it easier for you to quilt your happy out.
And now to my favorite part of any quilt: it’s time to pick out fabric!!!
Everyone has their own rule of thumb for fabric selection. Whether you go on scale, designer, fabric company, color scheme, it all works. What I normally do is pick a fabric I love and then try to find as many fabrics as possible that go with it. Most of the time I have too much, but hey I like ‘em scrappy. And where does that fabric that I started with wind up I hear you ask? Sad to say, but it goes on the back a lot because I can’t stand to cut it up.
The fabric I love and my jumping off point for Kismet is this luscious print from Hapi by Amy Butler.
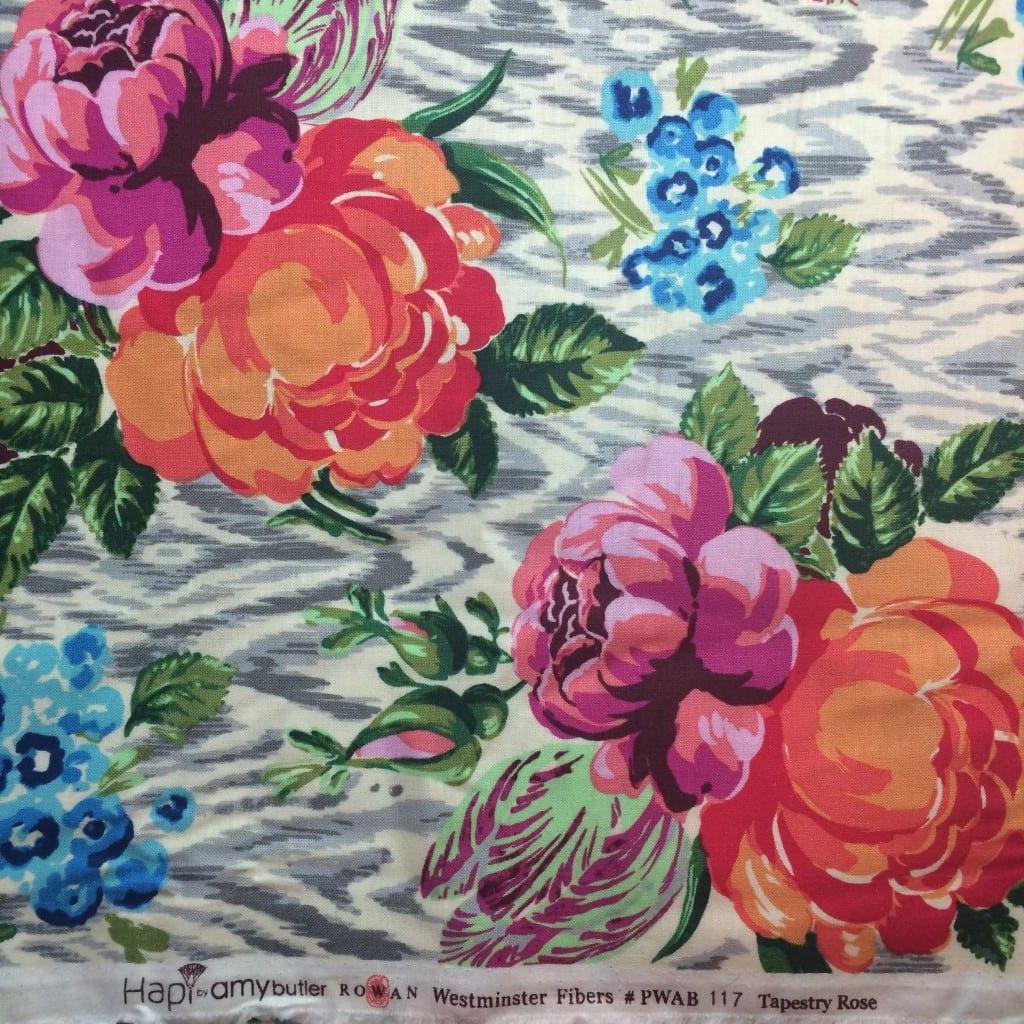
Beautiful, right? But I don’t think I can put it in a block or a background because those flowers are pretty big. It would just come out blotchy. If you’re not sure how your fabric’s going to chop up, make your fabric view finder with your hands. Do you get big chunks of nothing? Do you get big chunks of just one color? Probably not the best fabric to use in the main part of Kismet.
And here’s my stash-raiding pull for the colored part of the blocks.

I concentrated on colors in the big bunch of blooms, not because I don’t like the other colors, but I make A LOT of teal-y turquoise quilts. I’m trying to stretch myself! For each block, you’ll only need a 4” x 21” strip for the original Kismet or 2 5” squares (or 1 7” square) for the fierce Kismet.
Now comes the backgrounds. That’s right, there’s two of them.
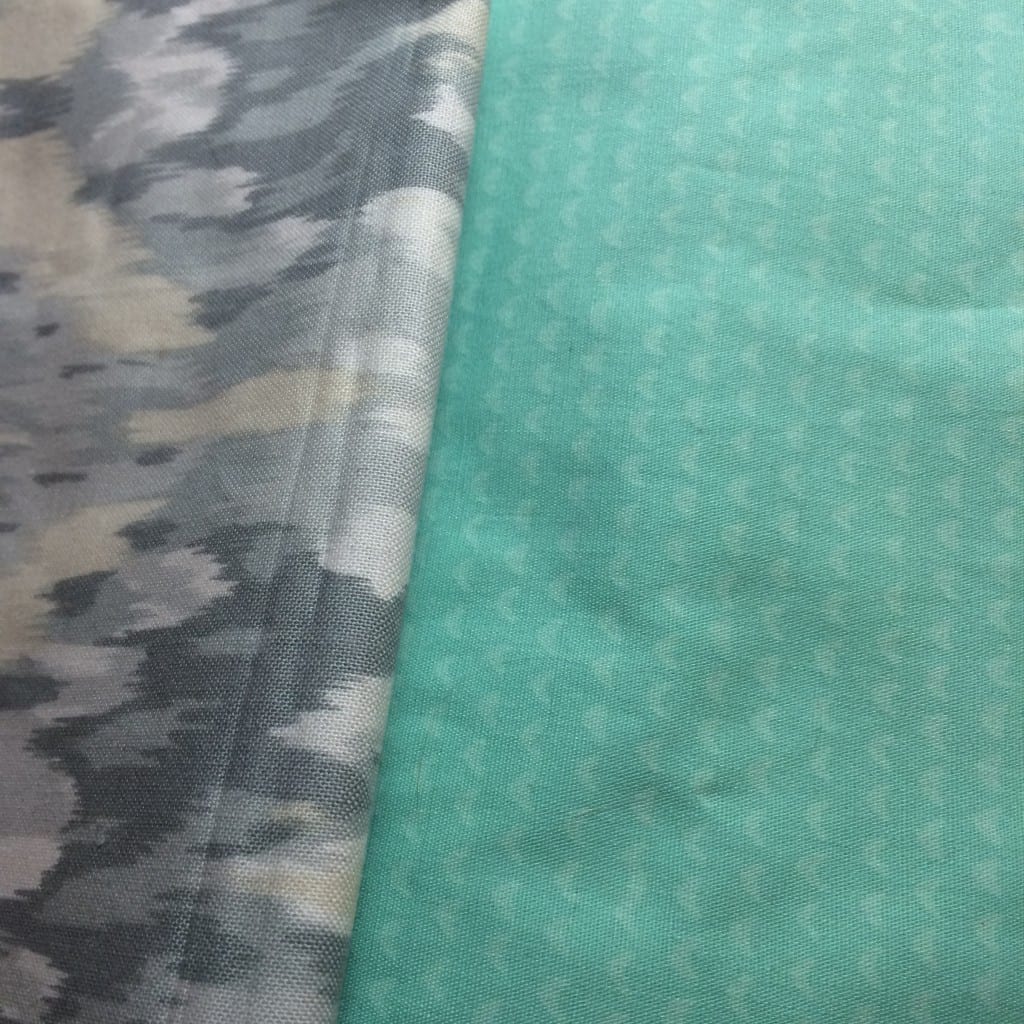
Some things to keep in mind—both the backgrounds touch all of your colors in your quilt. You also want to make sure there’s enough of a difference between the backgrounds so you get the cool secondary pattern when you stitch your quilt top together. My primary background is a nifty mint batik from Me and You by Hoffman Fabrics (mint is not teal. I’m still stretching myself.). My background accent, which is the blue chambray in the original quilt, is a Dear Stella print from a couple of years ago. I like how it echoes the background in the Amy Butler print but since it’s all neutrals the bigger pattern doesn’t overwhelm the bright colors.
Here are my test blocks, original on the left and fierce on the right.
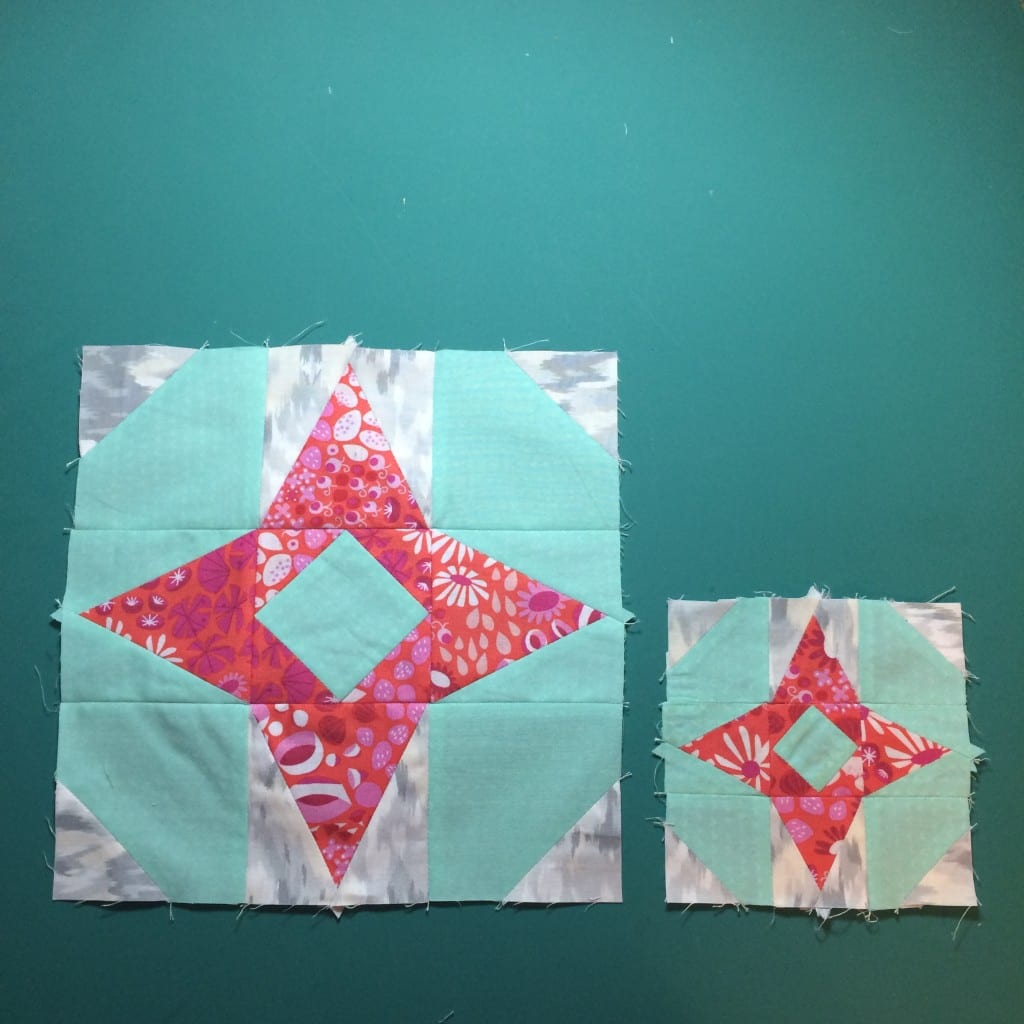 Yep, I make test blocks. I never know if what I have in my head will work until I make a test block. I also used the same fabrics in the same places. You get a much better idea of how the fabric will chop up, especially for the fierce block. That guy is an itty bitty 4.5” finished so you can use prints in there, but you won’t see all the print all the time. You could probably use the same fabric and have completely different looking blocks. How’s that for scrappy-efficiency? After making the test blocks, I’m going to play around with the background and background accent fabrics some more. It’s not gelling for me yet.
To sum up:
- Pull your favorite fabrics, you won’t need much of each.
- Use your fabric view finder. Will it cup up like you want it to? Are you going to brave some fussy cutting? Food for thought…
- Make a test block. No really, MAKE A TEST BLOCK.
- Don’t be afraid to go back to the drawing board if it doesn’t look right straight away.
I’m all for breaking rules, so if it looks good to you do it. I promise I won’t come at you with a yardstick.
1 Comment
Comments are closed.
Amy
8:39 AM, January 2016
Just found this site and love the pattern! Looks like I’ll be digging through the stash tonight to see what will work so I can join the QAL. Excited to find y’all!