
July17, 2016
How’re your Smorgasblocks coming? I saw some great curved piecing with last week’s Scandi Windmills. Your quilts are inspiring! Keep it up!
This week we’ll tackle half rectangle triangles with Twizzle by Heidi Grohs of Buttons and Butterflies. Heidi makes beautiful quilts and her blog is chock full of step by step pictures of her creative process. It’s always fun to take a peek inside someone else’s brain. Check out Buttons and Butterflies here!
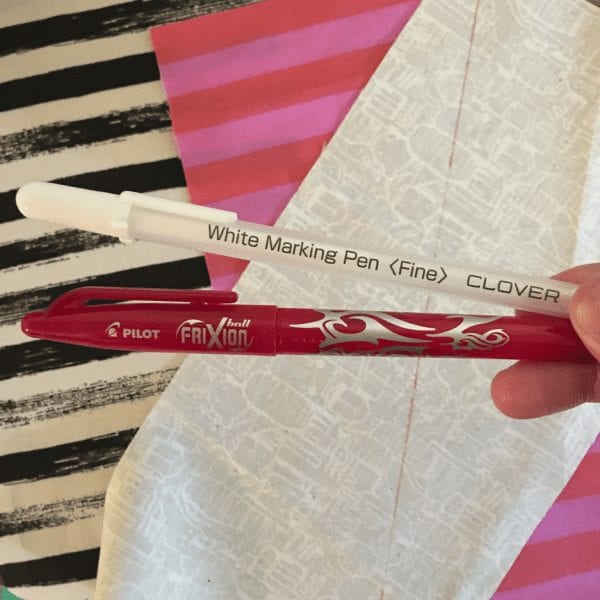
A half rectangle triangle, or HRT, is a unit that give a lot of wow but is easier than you think. The key to success is make sure you mark them and be consistent. I used a Frixion pen and a white Clover pen to mark my rectangles. I would’ve used a Frixion pen for both, but my red pen doesn’t show up on hot pink. My preference for the color versus white is only because the white pen takes a couple seconds to show up, and I’m impatient. Both disappear with heat, so as soon as you press your HRTs, the ink is gone.
After making my HRTs, I measured and they did not come out to the dimension listed in the pattern; mine were the right length but a quarter inch narrower than they were supposed to be. Now I’m not one to leave mistakes as is and just smoosh pieces together that don’t fit. However, after talking with Heidi, we both agreed that consistency to your own sewing is more important that being a slave to the pattern. And where this block fits in the overall smorgasblocks quilt, the width is less important than the length.
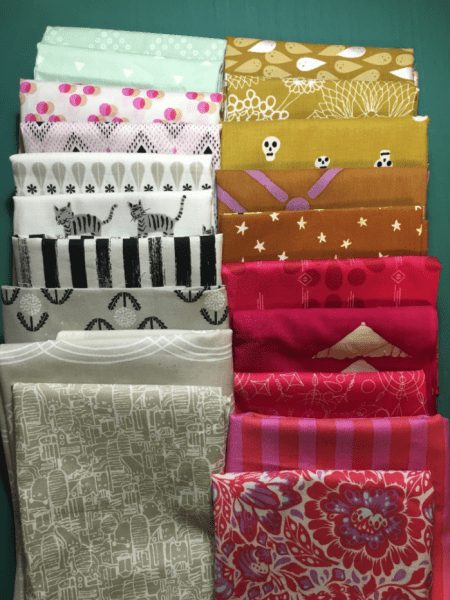
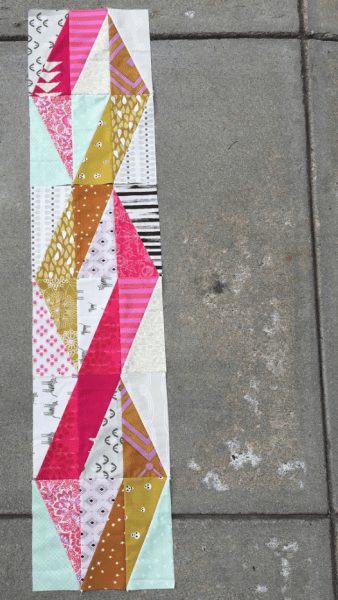
Since I wasn’t making the full quilt, I wanted to do my Twizzles as two colors twisting together rather than one, the scrappier the better. The pattern called for nine rectangles per Twizzle, but I picked five gold fabrics and five pinks, and ten assorted backgrounds including some low volume busy backgrounds.
To make the twist in two colors I followed the instructions to make A/B and C/D blocks, but I used three gold and three pink for A/B rectangles, and the remaining two gold and two pink for C/D rectangles. This means when you lay it out you’ll have an extra C/D block of each color. But it’s pretty. And now I have the start of a label.
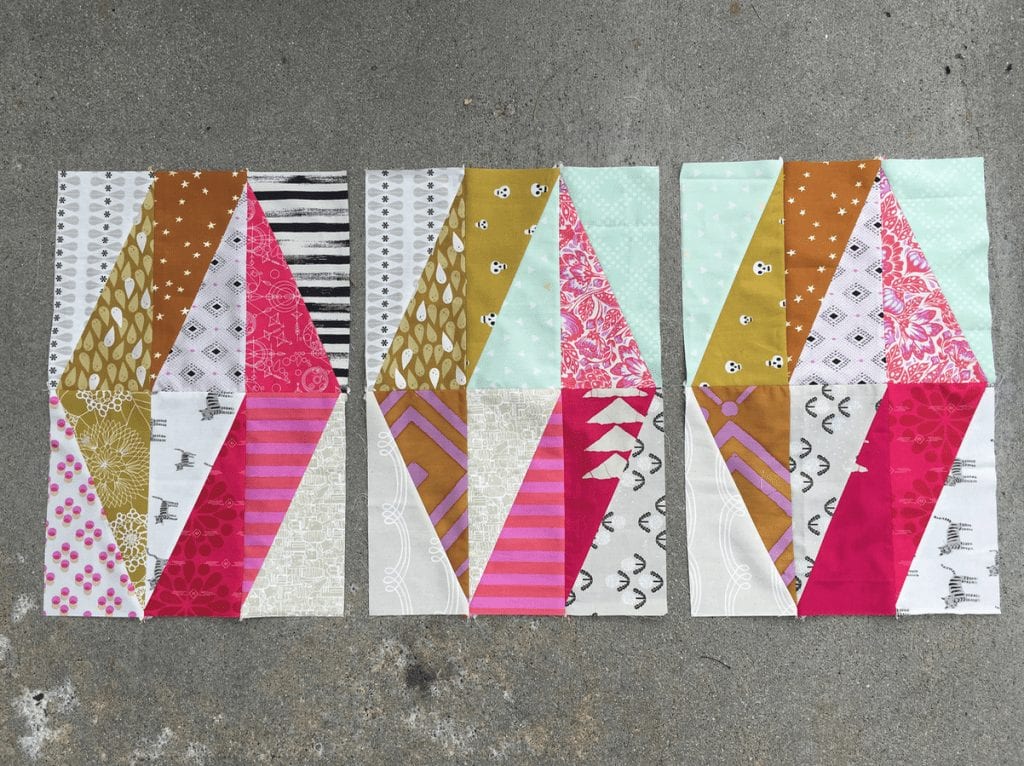
Here are the three blocks layed out to complete your Twizzle! You can even get a teeny head start on putting your quilt together and stitch them end to end if you’d like…
To download the pattern from Buttons and Butterflies’ Craftsy, click here. Remember, you will make three Twizzle blocks, which is also one whole Twizzle column shown on the cover.
This is just about the half way mark. Keep up the good work!
5 Comments
Comments are closed.
Heidi Grohs
10:07 AM, July 2016
Love your color choices!!!!!!
I also have a tutorial on my blog discussing the HRTs in depth. I’ve had a few people confused using only the pattern institutions!!!
And thanks for the kind words about my blog!
Anneliese
6:21 PM, July 2016
Hi there! Do you have the address for the HRT tutorial so I can add it? I tried to find it but I kept getting linked back to the pattern…
Amy
12:03 AM, July 2016
I can’t wait to start these blocks. I’ve never done HRT’s before. I need to catch up on the other block first. Thank you!!
JaneE
4:04 AM, July 2016
These are really fun!
Eye Candy Quilts – The Smorgasblocks: Putting it All Together Part 1
9:52 PM, July 2016
[…] if you haven’t already, go ahead and stitch your Twizzle blocks from last week end to end to make a column. This won’t attach to the section […]