

September4, 2016
Didn’t it turn out so fun?! I love seeing all the different versions everyone does through Instagram and the smorgasblocks hashtag. Keep’em coming! Grab your smorgasblocks and let’s get to it.
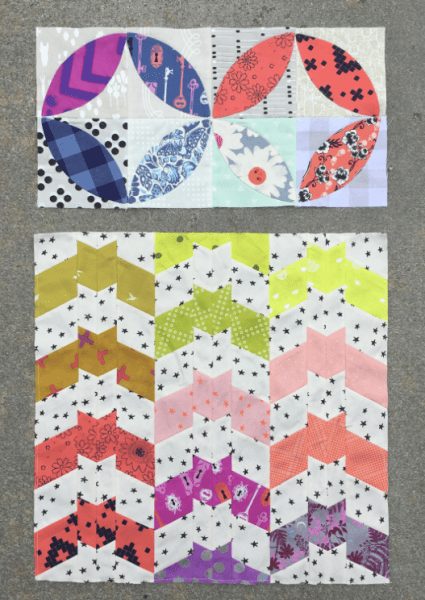
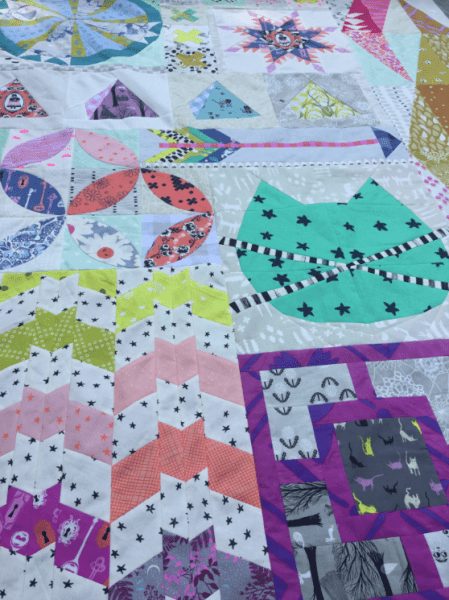
First, take eight of your Orange You Glad orange peels and stitch them into two rows of four. Pay attention to which direction your orange peels go. You can go the traditional route and have them alternate, or make it your own and have them go any way you like. Stitch this orange peel section to the top of your Barn Bats. Note that the center seam of the orange peels lines up with the enter seam of the Barn Bats.
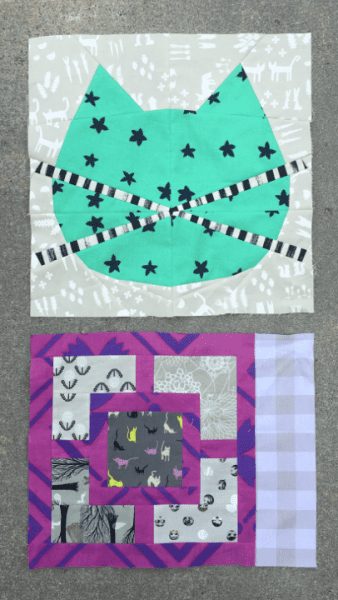
Next, stitch a 3½” x 12½” strip to the right of your Garden Fence block. Take your Whiskers and stitch that to the top of your Garden Fence unit.
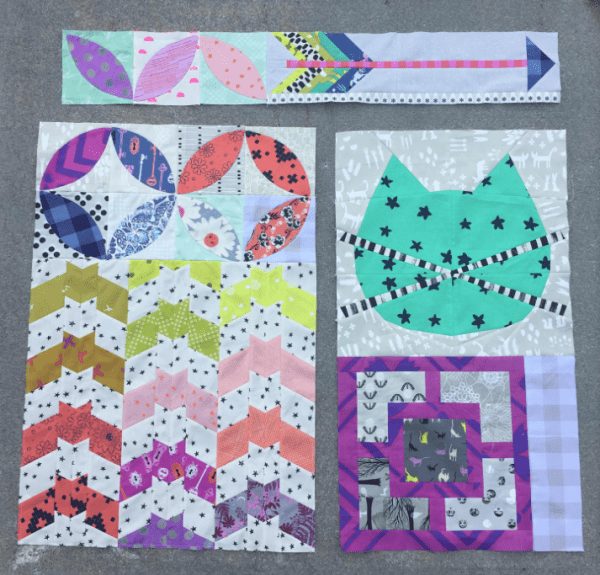
Stitch your remaining three orange peels together, again alternating the direction or arranging them how you see fit. Take your Arrow and stitch a 1″ x 20″ strip to the bottom. Stitch the orange peel section to the left of your arrow to make a long row. Stitch your Orange You Glad and Barn Bats unit to the left of your Garden Fence and Whiskers unit. Then stitch your Arrow orange peel row on top.
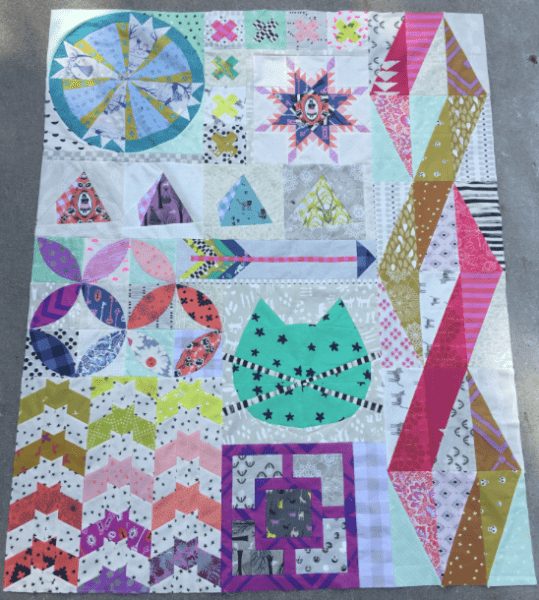
This is the bottom of your quilt. Stitch it to the bottom of the No-Y Seam Feathered Star, Raspberry Kiss, Spinning Pyramid, and Scandi Windmill unit we pieced together a couple of weeks ago. Finally, stitch your Twizzle column to the right side, or the left whichever you like, of your quilt top.
There you go! Your smorgasblocks are all together and making friends. We still have one week left to continue the mystery…
The mystery is borders. Next week we’re doing borders. See you then!