

October31, 2019
I’m a big fan of dress up, but I’m also a big fan of multi-use makes. For the Gremlin’s Halloween costume, I wanted to make him a dragon hat that could double as his winter hat.
I found this FREE, that’s right it’s a freebie, pattern from Purl Soho. Click here to download your copy. You may notice when you open the page that no where on it does it say ‘dragon’. That’s right, we’re going to turn that meek little lamb into a raging red dragon with very little effort.
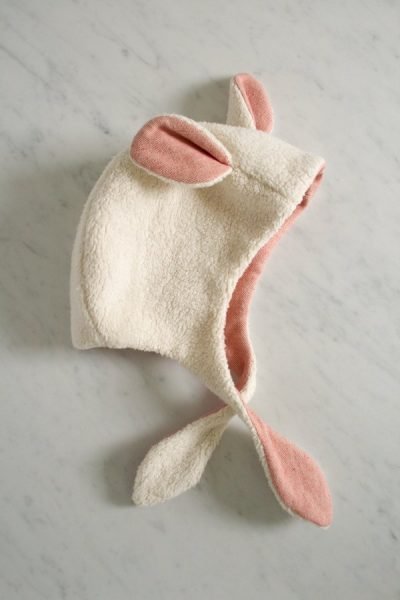
 Purl Soho FREE Lamb Bonnet Pattern
For the main part of the hat and the outside of the ears I used the red scaly spandex I talked about in the earlier post, but I stabilized it with the woven stabilizer. I found that it kept the fabric softer and more pliable, perfect for a Gremlin’s noggin. I used the same stabilizer on the interior orange fake fur, spikes, and horns. The main trick I have with stabilizer is the same trick for fusible webbing; trace your shape onto the stabilizer and then rough cut the shape. Leave some around the edged so that it will fuse all the way to the edge. Then, cut the shape exactly once the fabric and stabilizer are fused.
The other thing to keep in mind for this particular pattern is that you’ll need a left and a right hat side. It’s easy enough to do, just fuse and cut one side and then flip it and use it as a template for the remaining hat side. You’ll need to do this with the hat lining as well.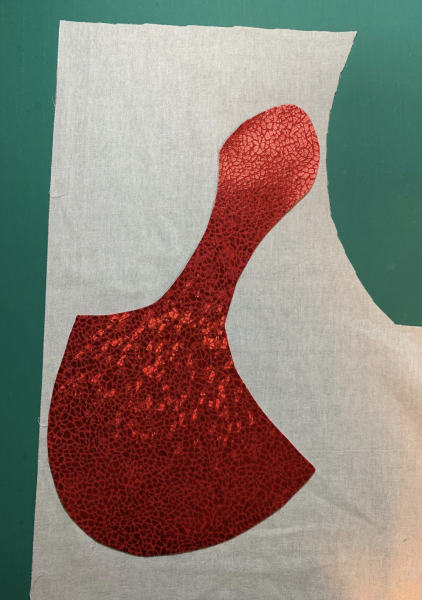
If you forget, your bottom ties will be going different directions. They’ll still work as far as earwarmers go, but I’m not sure they’ll be great ties.
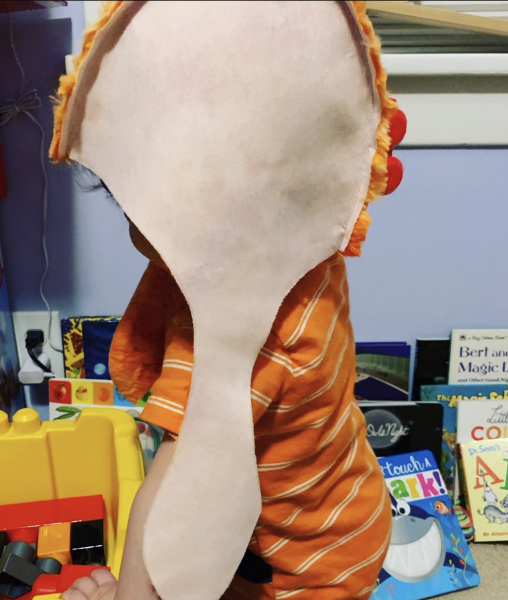
And before you get too far, you might want to pop the lining on the recipient’s head to make sure that you’re working on the correct size.
For the spikes and horns, I quickly drew a spike and then used my 60 degree ruler to trace a horn. I knew the spike would be easier since it was just spandex so I let it have a bit of a curve. I didn’t want any curve for the horn, those sequins were going to be a challenge anyway, hence the ruler.
Alright, let’s talk sequins. After a preliminary googling (this is set of tips that helped, you have to scroll a little)and a bit of prayer, I dove in. This is what I found worked the best for sequin prep:
- Trace the shape including seam allowance on to fusible woven stabilizer.
- Fuse stabilizer to the back of sequined fabric.
- Cut out shape from the back. Use sharp heavy duty scissors, you are cutting through plastic after all.
- Flip shape over, make sure all the sequins are going the same direction. That’s right, pet the nice sequins. They won’t bite.
- You need to remove the sequins from the seam allowance by clipping the sequins, not the thread that’s holding them to the fabric, and pulling the sequin pieces out of the seam allowance.
Bigger shapes are going to be easier to maneuver but you’re also going to have to cut more sequins off before you can get stitching. It’s a trade off.
I put my equally eyeballed spikes and horns in the hat seams when I stitched the ears in. They popped up when I turned the hat inside out. And voila!
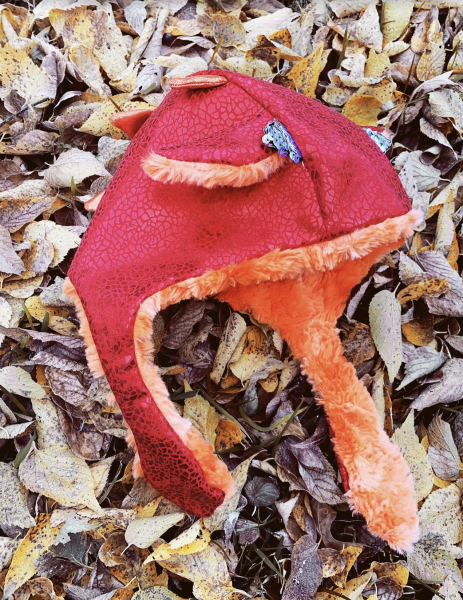
A dragon hat! Good for Halloween and good for the winter. And yes, the ties will be used at all times because the Gremlin hates hats…maybe he’ll like wings better?
The dragon wings are up next!