October31, 2019
Last step! And the most intense. It’s time to wing it!
Except not wing it in the traditional sense because that would be failure. At least for me. Anyway!
I am always happy to support fellow designers, which is what I did for the Gremlin’s wings. I used a pattern called Wife-Made Dragon Wings, which is an add-on to her original Wife-Made wings pattern. You can check out the Wife-Made Etsy shop here.
 Wife-made Dragon and Bat Wings Pattern Add-On
I think the pattern is very clear and easy to follow. I did the digital download which means I printed my own templates, just like I did with the Purl Soho hat. And a reminder, because I get these emails from our Etsy shop too, when you print a pattern that has templates whether for clothing or appliqué or EPP, make sure that you do not have ‘scale to page’ selected. This will make your templates off and all your pieces and parts not fit. Then you’ll be sad. And sewing shouldn’t make you sad.
Wife-made is an Australian designer, which I noticed when she went over the different stabilizers she used. After some googling, I don’t think it’s because she gets different stuff in Australia but because I went to a chain store which gives you one brand. One brand over and over and over again. Anyway. The other point about stabilizers is I would say to get more of a heavy weight sew in stabilizer than the pattern calls for. I don’t know if it’s because we had different width stabilizers or some other reason, but I had to seam one of my wing layers to get a full shape.
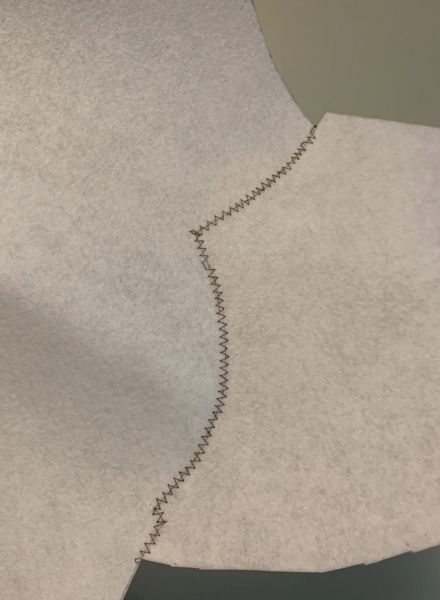
If you’ve never seamed a thick sew in stabilizer before, it’s the same principle as joining batting. Butt the two pieces together and go over the join with a zig zag stitch, making sure that you catch both sides.
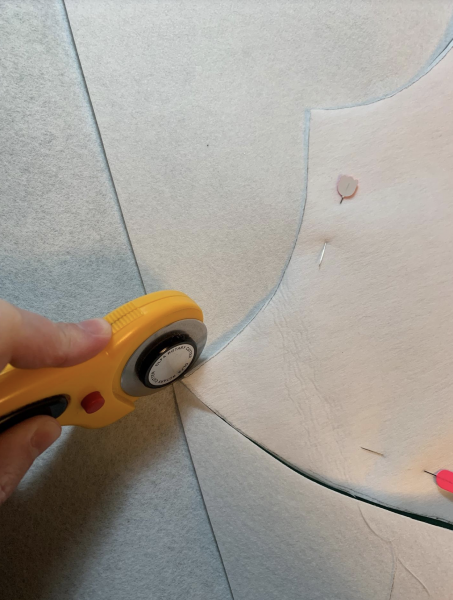
Another tip is that I use my rotary cutter to cut out pieces for clothing or stabilizers. I first saw a classmate do this and hold the rotary cutter not like a pizza cutter but like an upside down lollipop. I still live in terror that her hand would slip over that blade. Yeesh. So I use the pizza cutter method, particularly for cutting multiple layers of the thick stabilizer.
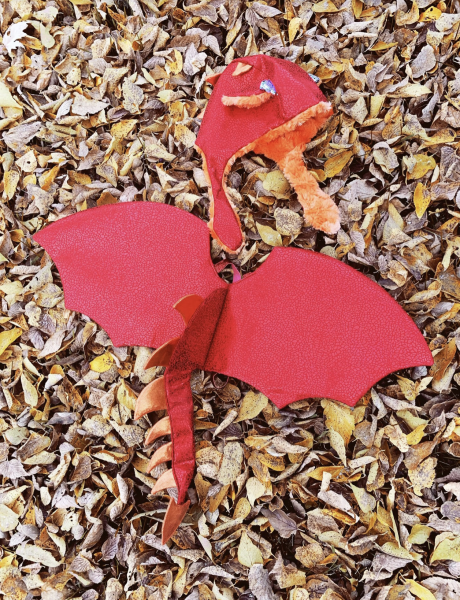
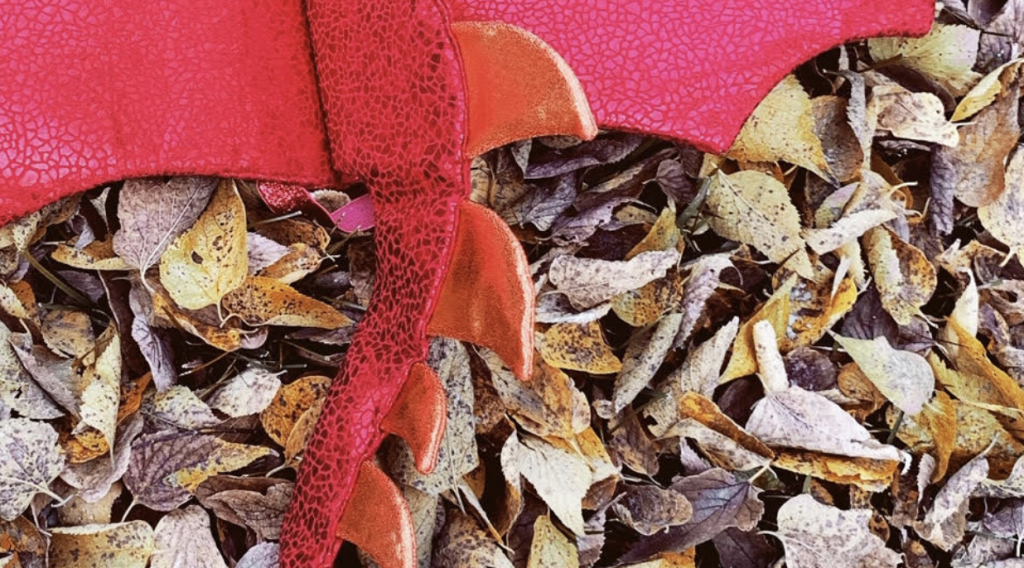
Wife-made mentions in her pattern to use three layers of stabilizer in the dragon wings in particular. I was worried about making them too stiff to stitch through, so I went with two. I can’t decide if it was a good thing or a bad thing, but this is what the wings-in-progress looked like on the Gremlin.
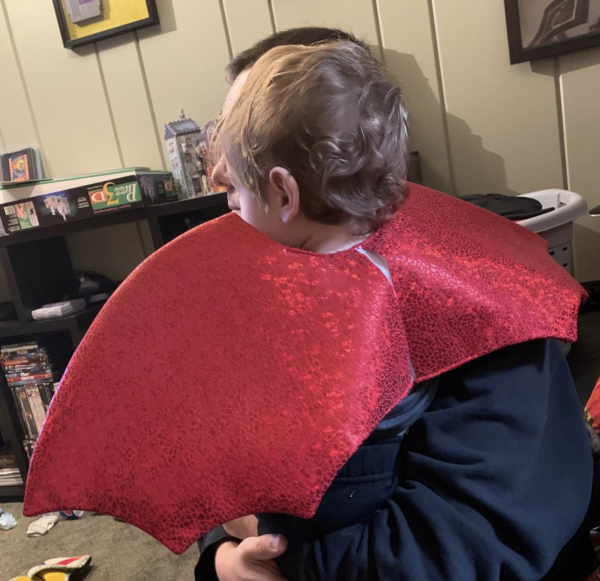
They buckle a little bit, but it’s not bad. Also he hates wearing them. And I was going to put panels of sequins appliquéd on the back to truly make them blue like his WubbaNub, but I decided against it as he sat there rage-chewing them. Oh well. Maybe I can add the sequins in a couple of years. How you ask when you can’t iron directly on the dragon fabric since it’s already finished? My plan is to turn the edge of the appliqué under and then used E6000 glue to glue the appliqués on. E6000 holds everything, so be careful, but it doesn’t need heat to make it permanent.
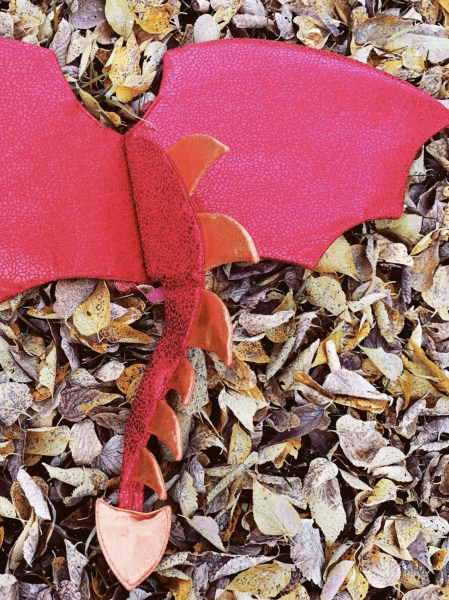
But as far as there are now, I really like how the wings turned out.
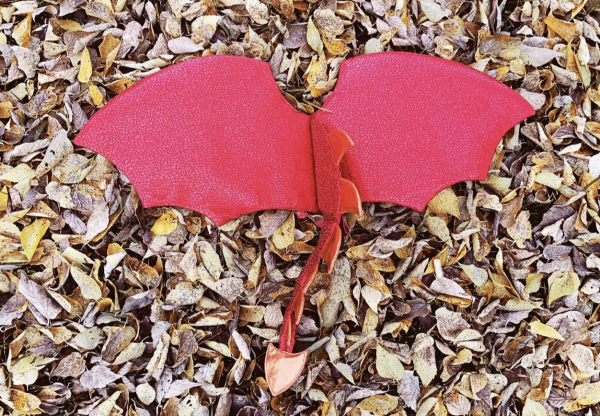
Although I’m fully expecting someone to call him a devil instead of a dragon. I’m hoping the tail will be more of a clue.
I don’t know that we’ll get good pictures between the cold and the snow and the rage chewing of wings, but we’ll try. Hopefully our dragon combo of footie pajamas, winter hat, and wings keeps the Gremlin toasty and ferocious. Happy Halloween!